So a little while back, I was playing around with my machine’s BIOS, and without going into specifics. I messed it up big time.
So much so that eventually I couldn’t get a display to show and no display-out. Hence, I’ve decided to make this tutorial to help those in the same or a similar situation.
The techniques in this article should still apply to any other kind of laptop or computer system where there is a EEPROM that has enough space around it to attach an test clip to.
Note that this should be a LAST-DITCH effort to fix your machine. Try everything else, if it doesn’t work then proceed(Accept that I’m not responsible for anything that goes wrong on your machine).
Prerequisites:
- To do this SPECIFIC repair you will require a 25 series EEPROM programmer. The series will vary depending on the model number of the BIOS chip on your machine.
- You’ll need a programming software, in this tutorial we will use the open source AsProgrammer (Don’t worry the program has an English translation as well).

- After extracting it you’ll find the CHA341A drivers in the package, install the parallel drivers.

- Assemble and understand the CHA341A Programmer
- Download the replacement BIOS file (STOCK 311 BIOS DUMPED FROM CHIP! Specific to gl703gs (but may work for other gl703 series))
WARNING: DO NOT ATTEMPT TO FLASH USING THE BIOS FILE ON THE MANUFACTURER’S WEBSITE, IT WILL NOT WORK AS IT IS DESIGNED TO BE USED WITH THEIR FLASHING PROGRAM NOT A DIRECT FLASH TO CHIP USING A SEPARATE PROGRAMMER.
Step 1:
Open up the laptop (Be sure it is powered off)
Step 2:
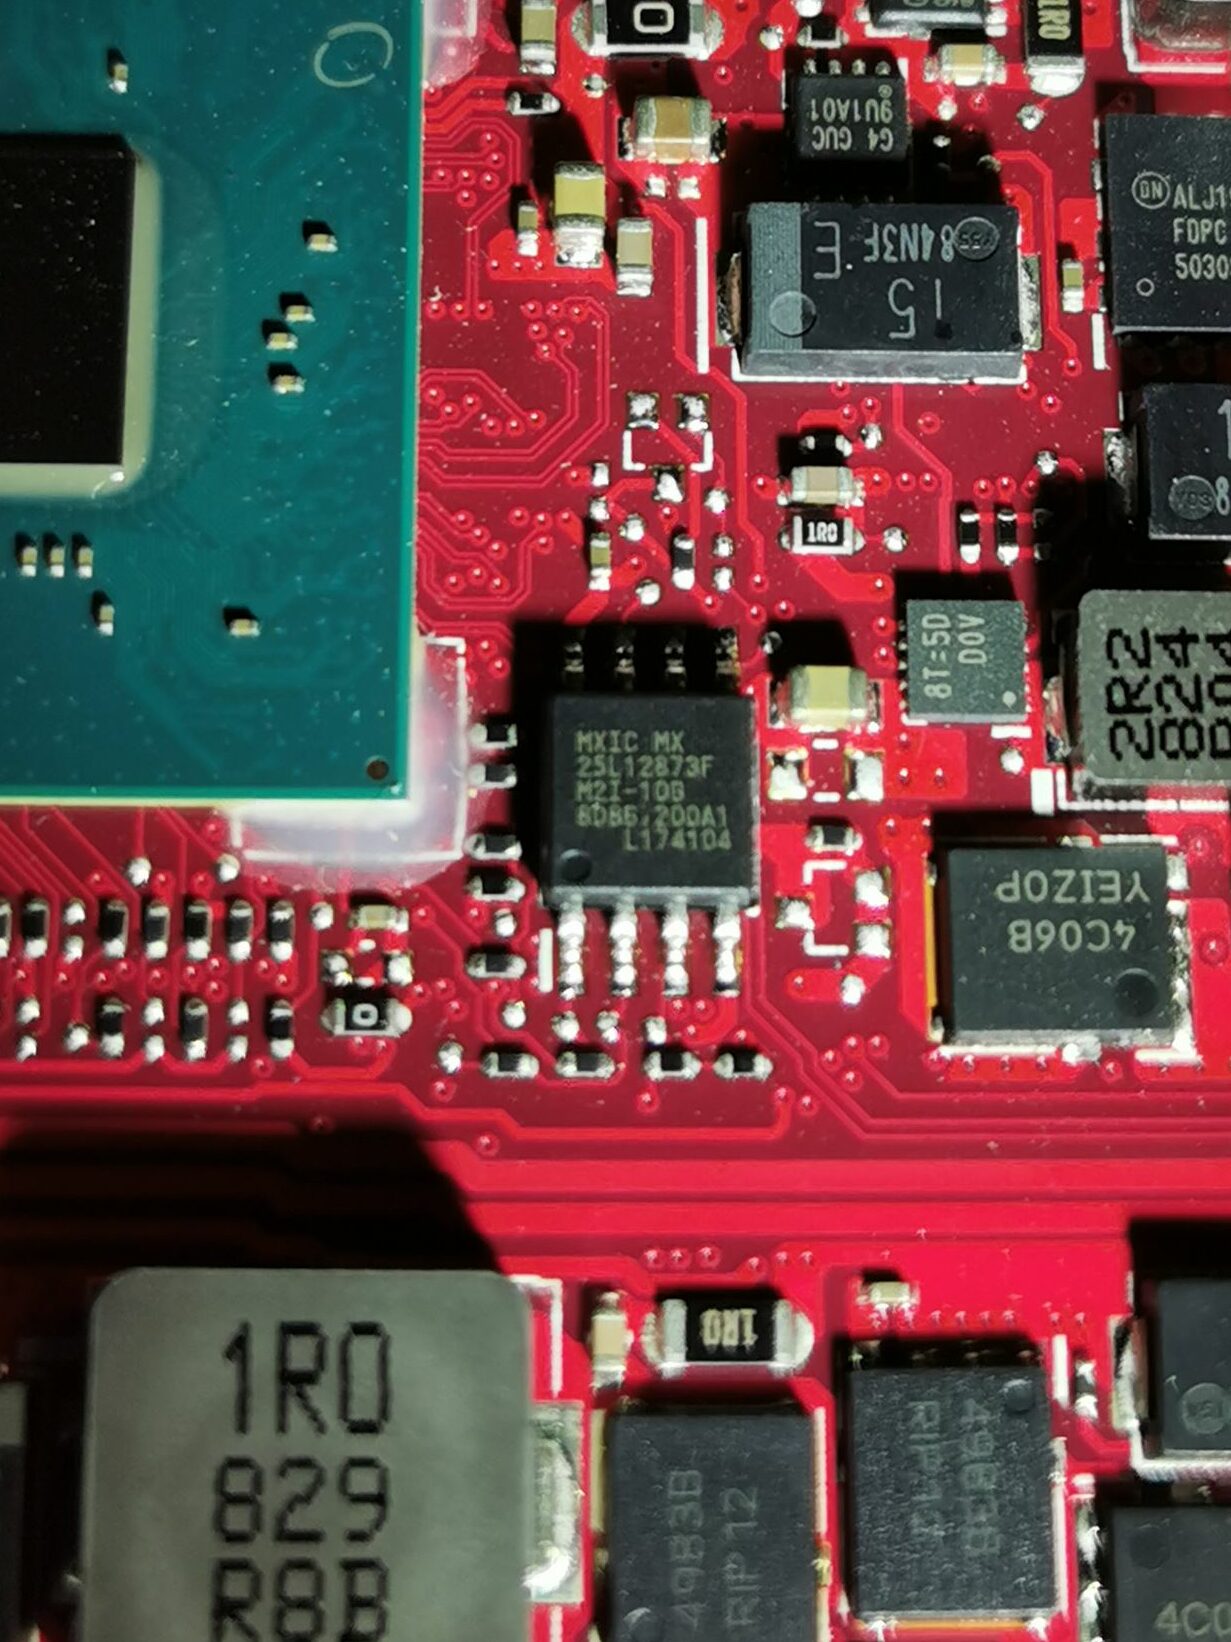
Find your BIOS chip.
In the case of this laptop it is the MXIC MX25L12873F, notice the 25L part, that refers to the series. It is important to get a programmer that is compatible with YOUR chip as they may have different spacing. Note the little dot on the left hand corner, that is the Pin 1 position, REMEMBER it, it is important later.

Step 3:
Disconnect the Laptop Battery (push the metal cover forward, then pull cable up)

Disconnect the CMOS Battery (pull out)

Step 4:
Use the assembled test clip to attach to the bios chip, MAKING SURE, that pin 1 position(the dot indicates pin 1) is connected to the wire that is coloured red/purple. You may need to adjust it several times till you can get a good connection, note that the 2nd red light on the programmer may not turn on until you attempt to write to the chip.
Step 5:
Open AsProgrammer and select IC->Search and put the model number of YOUR bios chip, double click it when you find it.


Step 6:
Now we need to make sure that the connection is good, unfortunately I haven’t found a really easy way of doing this.
Option 1: If you haven’t flashed before using a hardware programmer you can try to read the chip and make sure that you don’t get all 00 or FF in the hex view.

Option 2: You can try to Protect and UnProtect the chip, as this process will hang unless you have a good connection.

Option 3: You can try to program the IC with some random file or data and then read to see if the same hex data was read that was written.
Either way, once you’ve verified that the connection is good you can proceed.
Step 7:
Now its time to erase the IC and program it with the BIOS file you downloaded earlier.
First Erase the Bios, and wait for the complete message to appear below

Now open up the BIOS file


Now click Program IC

Then let it finish
Now its time to verify it was written correctly, so click Read IC

And ensure that the contents of the hex view are the same as before (just check the starting bits and the ending non-zero bytes to make sure they are the same)
Start

End

Step 8:
Now its time to re-assemble the laptop, first re-connect the CMOS Battery, then the Laptop Battery, reassemble the laptop case, then plug in the charger, and give it a try. Hopefully at this point your machine should boot.
That’s it 😉
Hope this tutorial helps you out of a bind, it took me a while to figure this stuff out.
Helpful tip: If you are modding and have used the official updater program and are wondering why your BIOS keeps updating/bricking itself upon reboot, you need to remove the firmware BIOS update driver, in device manager (as that is where it installs)
Comments