Step 0 : Unattended Upgrades
The preparation step is to install unattended upgrades as an un-patched web-server is a really bad thing
sudo apt-get update && sudo apt-get upgrade
sudo apt-get install unattended-upgrades apt-listchanges
Now edit the following file:
sudo nano /etc/apt/apt.conf.d/50unattended-upgrades
Un-comment the line:
"origin=Debian,codename=${distro_codename}-updates";
And hit Ctrl+o and Ctrl+x to save and exit
Now to ensure /etc/apt/apt.conf.d/20auto-upgrades exists
dpkg-reconfigure -plow unattended-upgrades
Lets give it a test run to ensure things aren’t configured wrong
sudo unattended-upgrade -d
Step 1 : Install OpenLiteSpeed & MariaDB
First lets add the OpenLiteSpeed server to our a repository list in our Debian sources.list so we can get the latest version
wget -O - http://rpms.litespeedtech.com/debian/enable_lst_debain_repo.sh | bash
Now to install our packages (the nice thing is that OpenLiteSpeed now comes with PHP73 included)
sudo apt-get install openlitespeed mariadb-server
sudo apt-get install lsphp73-common lsphp73-curl lsphp73-imagick lsphp73-imap lsphp73-json lsphp73-memcached lsphp73-mysql lsphp73-opcache lsphp73-redis memcached lsphp73-intl
Lets ensure we can access the included WebAdmin GUI for OpenLiteSpeed by running the initial configuration script
sudo /usr/local/lsws/admin/misc/admpass.sh
You will be asked to set a username and password, set them to something secure and be sure to write them down somewhere so you don’t forget
Now you can load and access the GUI from a browser at any time wish:
SERVER_IP_ADDRESS:7080
Note: That you may encounter a certificate error on some chromium browsers, its okay to ignore this at this point, and proceed anyway if your browser allows it, otherwise use a different browser
Now lets do the initial configuration for MariaDB
sudo systemctl start mysql && sudo mysql_secure_installation
Important! You will be asked for the MySQL root password by default this is empty so just hit enter at this point
Now press “y” to set a secure MySQL root database password, then answer “y” to all the remaining questions (remember to write it down somewhere)
Step 2 : Configuring OpenLiteSpeed
Lets create the directory for a virtual domains and setup the directory structure in such a way that we can easily add more domains to our server in the future (remember to replace website.com with whatever your domain name is)
mkdir -p /var/www/website.com/{conf,logs,html}
cd /var/www
chown -R lsadm:lsadm *
Now ideally we’d want our configuration files to all be in /var/www/website.com/conf
For some silly reason OpenLiteSpeed wont allow that so we have to do a bit of a Linux trick to get make it think we are actually under its directory of /usr/local/lsws/conf/vhosts
Lets first delete the existing directory located there (note if you have existing configuration files from a previous install, be sure to back them up; by default only an Example configuration is here)
rm -rf /usr/local/lsws/conf/vhosts
Now lets use a symlink to link our /var/www/ to /usr/local/lsws/conf/vhosts
ln -s /var/www /usr/local/lsws/conf/vhosts
Lets go login to WebAdmin (again located at SERVER_IP_ADDRESS:7080)
Now click on Virtual Hosts – > + Sign to add a Virtual Host
Fill in the following details:
Virtual Host Name: website.com
Virtual Host Root: /var/www/$VH_NAME
Config File: $SERVER_ROOT/conf/vhosts/$VH_NAME/conf/vhconf.conf
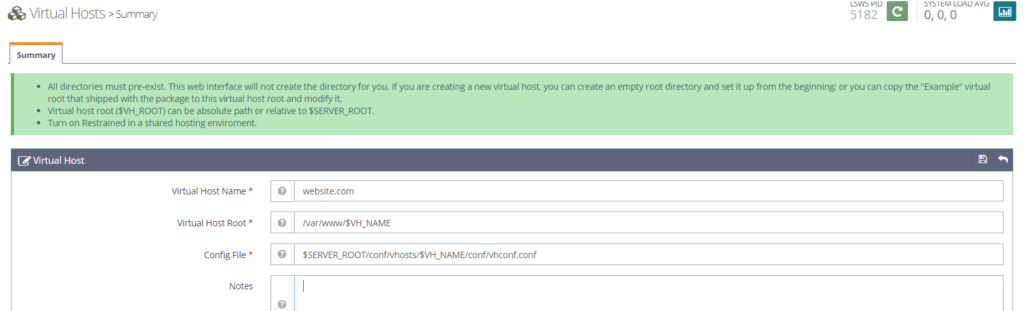
Now hit save and you’ll get an input error, click the link to create the file

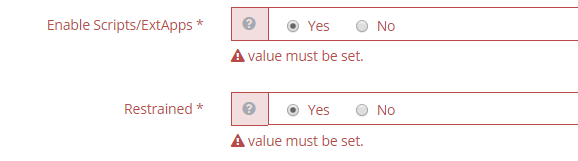
Ensure the following radio buttons are selected and hit save again
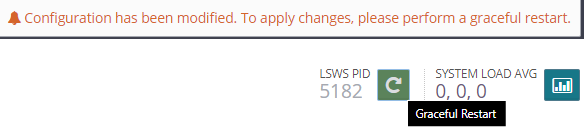
Now lets hit the green graceful restart button on the top right to get rid of this warning (note you will have to do this again every-time you update something in your configuration, i will only mention it this once but be sure you remember to do so)
Now hit the magnifying glass to view our configuration again and go to the General tab and edit the Document Root to $VH_ROOT/html and hit save again

Now hit Listeners on the left-hand navigation bar
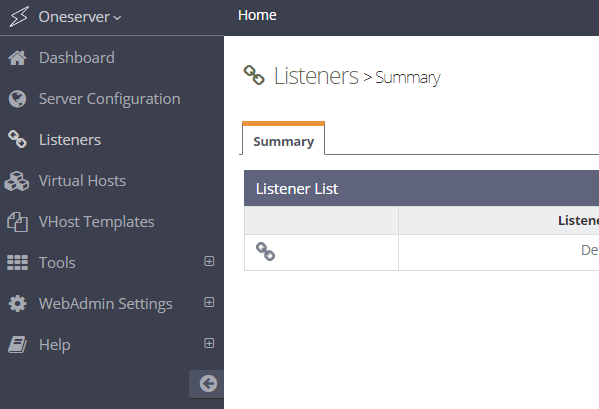
Delete the default 8088 configuration as we wont be using it
Now create a new Listener in a similar fashion that we made the Virtual Host earlier
Well call this listener HTTP
Set it up to listen on port 80
HTTP isn’t a secure protocol, so we set Secure to No
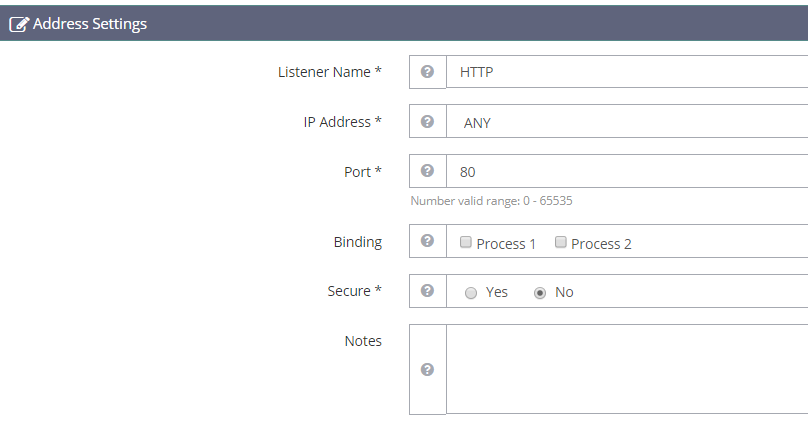
Now save and create another Listener
Well call this listener HTTPS
Set it up to listen on port 443
HTTPS is a secure protocol, so we set Secure to Yes
Now we need to add Virtual Host Mapping to our listeners , first click add on Virtual Host Mappings

Next put the following values, and save
Virtual Host: website.com
Domains: website.com
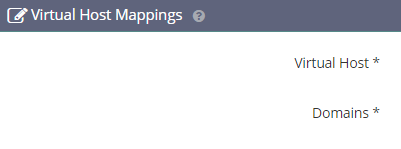
This needs to repeated for the HTTPS Listener as well
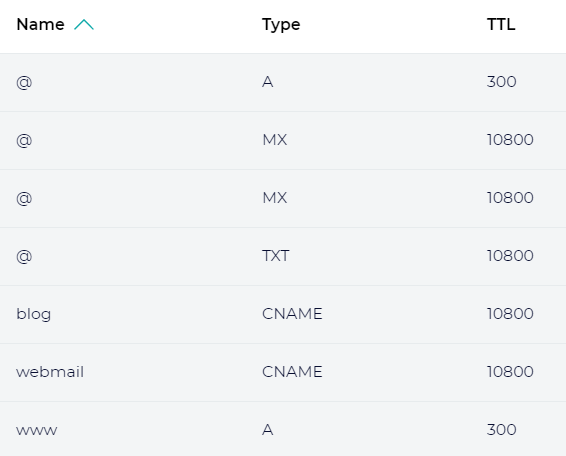
Step 2.1 : Updating DNS Records
Ensure that both the A record for @ and www are pointing to your SERVER_IP_ADDRESS
Step 2.2 : Continuation of Configuration
Now if we head over to website.com in a browser we should get the following 404 error screen since we don’t have anything in our html folder yet

Congratulations if you’ve gotten to this point you’ve successfully configured your OpenLiteSpeed installation
Step 3 : SSL/HTTPS Configuration & Automation of LetsEncrypt
Important Note: This part of the guide is something you should do after creating all your Virtual Hosts for your domain names, as there is a verification step that will fail if your DNS isn’t properly configured
First install the certbot package, this will handle the certification generation for you.
sudo apt-get install certbot
Now use the following command to generate a certificate for each of your domain name(s) (remember to replace website.com with your domain name)
certbot certonly --webroot -w /var/www/website.com/html/ -d website.com -d www.website.com
Now enter your email address, and agree to the terms as needed
If all goes well you’ll get a Congratulations!
Note the following two file paths as they are important
Your certificate and chain have been saved at: /etc/letsencrypt/live/website.com/fullchain.pem
Your key file has been saved at:
/etc/letsencrypt/live/website.com/privkey.pem
Its time to configure our Virtual Host Configuration to utilize these, this time navigate to the SSL tab
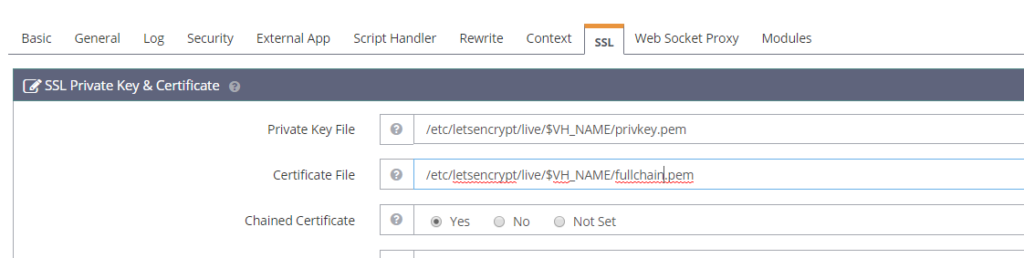
Values to be set as follows:
TIP: You can use $VH_NAME in place of website.com but this trick wont work for the Listener section that is about to come
Private Key File :
/etc/letsencrypt/live/$VH_NAME/privkey.pem
Certificate File:
/etc/letsencrypt/live/$VH_NAME/fullchain.pem
Chain Certificate:
Yes
Now save and check all the Protocol Versions in the SSL Protocols section and save again

We do this to have broad compatibility with different browsers
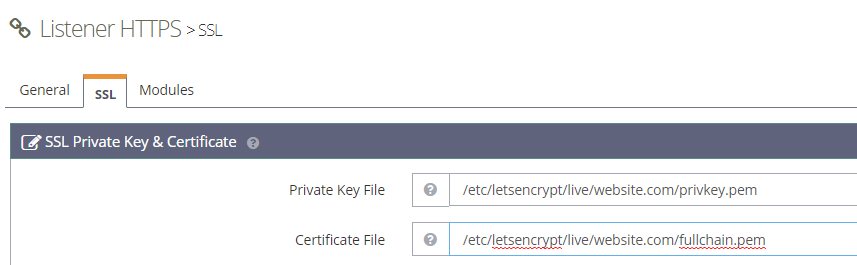
Now we must repeat these steps for the HTTPS listener, as it will be the default mode (which then gets over-written by our specific Virtual Host Configuration)
Basically if no SSL certificate is found in the Virtual Host Configuration this one will be used
Currently it is mandatory to set this in OpenLiteSpeed
Note that here we cannot use $VH_NAME so we must use the domain name
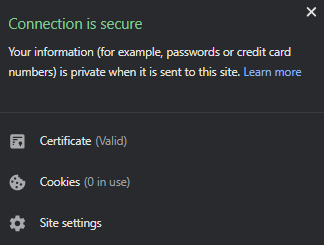
Head over to https://website.com and now you should see a re-assuring SSL Lock indicator on the left which means everything was configured correctly
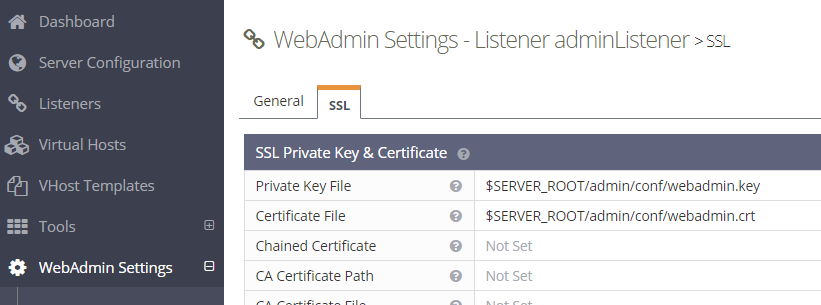
Optionally: Use this same Certificate and KeyFile for your OpenLiteSpeed WebAdmin (gets rid of the certificate error when using website.com:7080 instead of using SERVER_IP_ADDRESS:7080)
Now this certificate is only valid for next ~ 3 months, so to avoid an issue where users will get a certificate error in 4 months time, lets setup auto-renewal for our certificate(s)
First lets test that certbot is functioning correctly
sudo certbot renew --dry-run
Now assuming nothing went wrong lets create the cron-job to renew our certificates every month
sudo crontab -e
and add the lines
00 02 1 * * certbot renew >/dev/null 2>&1
00 03 1 * * /usr/local/lsws/bin/lswsctrl restart
Step 4 : Installation of PHPMyAdmin
First head over to https://www.phpmyadmin.net/files/ and find the latest version number (for me this was 5.0.1) then download using
cd /var/www
wget https://files.phpmyadmin.net/phpMyAdmin/5.0.1/phpMyAdmin-5.0.1-all-languages.zip
Now we unzip, rename, and then delete the now un-needed zip file
sudo apt-get install unzip
unzip phpMyAdmin-5.0.1-all-languages.zip
mv phpMyAdmin-5.0.1-all-languages phpmyadmin
rm phpMyAdmin-5.0.1-all-languages.zip
chown -R lsadm:lsadm *
Since we may want to access this same panel from various domains, lets create a symlink for our current domain instead of copying the folder over to the html folder
cd /var/www/website.com/html
ln -s /var/www/phpmyadmin phpmyadmin
Now lets configure it to use our MySQL root user
sudo mysql -u root
use mysql;
update user set plugin='' where User='root';
flush privileges;
\q
Some may tell you to create a separate user here for security reasons, but the fact is that phpmyadmin is most useful when run as root
We will address security concerns in the NinjaFirewall section
mv phpmyadmin/config.sample.inc.php phpmyadmin/config.inc.php
sudo nano phpmyadmin/config.inc.php
Now we need to generate a secret for the blowfish encryption, so just put any alphanumber character combination of length 32 here (May also grab one from https://www.random.org/strings/)
For example (DON’T USE THIS SAME STRING – MAKE YOUR OWN)
$cfg['blowfish_secret'] = 'csVH6hmV4_E5jNN7lVP8oWT_cY9avX_3'; /* YOU MUST FILL IN THIS FOR COOKIE AUTH! */
Now head over to https://website.com/phpmyadmin/index.php and login with your MySQL root user
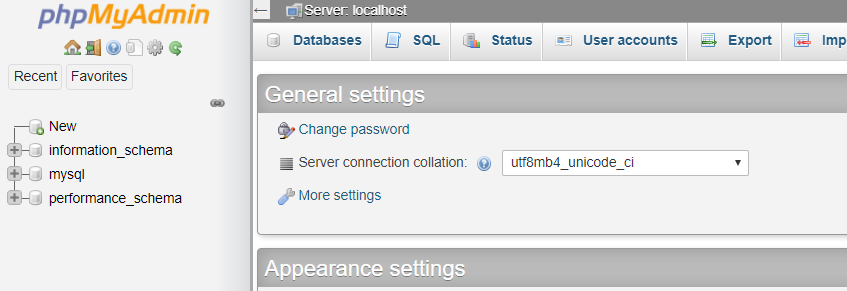
Important Note: Avoid using phpmyadmin over HTTP as it is vulnerable to a man-in-the-middle attack
Step 5 : Installation and Configuration of NinjaFirewall
Ninja Firewall is a Freemium Model General PHP Application Firewall that is most excellent in my experience at preventing exploitation of PHP Applications on your server
Lets head over to the free-download
https://nintechnet.com/ninjafirewall/pro-edition/#download
The latest version at the time of writing is 4.0.3 so I’ll be using that
mkdir -p /var/www/fw
cd /var/www/fw
wget -O fw.zip https://nintechnet.com/ninjafirewall/pro-edition/?f=1
unzip fw.zip
rm fw.zip
chown -R lsadm:lsadm *
Again for easy management we can create a symlink in our virtual host directory
cd /var/www/website.com/html
ln -s /var/www/fw fw
We also need to set the correct permissions
cd /var/www/fw
chmod -R 0777 conf
chmod -R 0777 nfwlog
Now lets head over to https://website.com/fw/install.php to start the installation
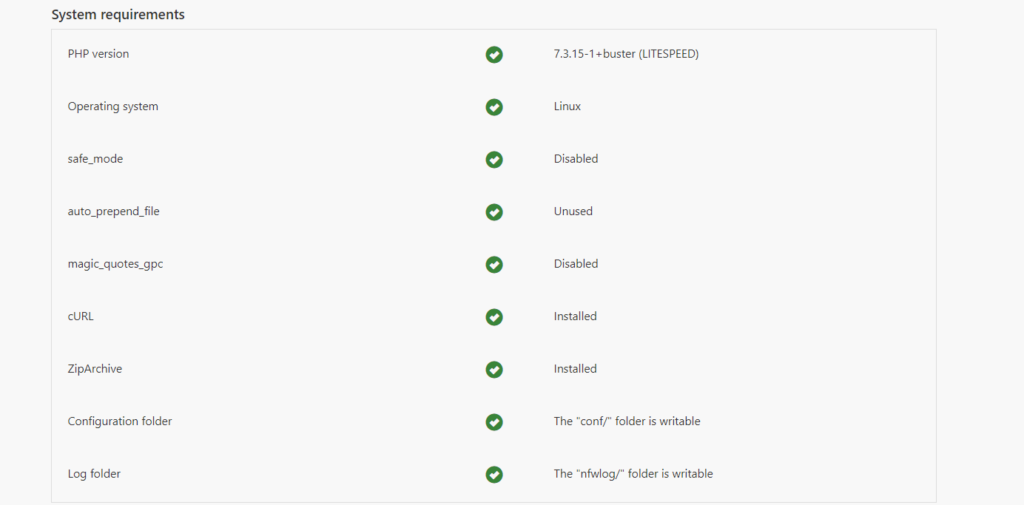
You may have an error telling us our PHP configuration doesn’t have cURL support and to install it even though you already did

In this case simply do a complete server restart since there is some configuration nonsense for lsphp that doesn’t update when just the OpenLiteSpeed service is restarted
sudo reboot
Now they should all be green
Now hit the next until you get to the the setting an administrator username and password (pick a secure user-password and record it somewhere safe)
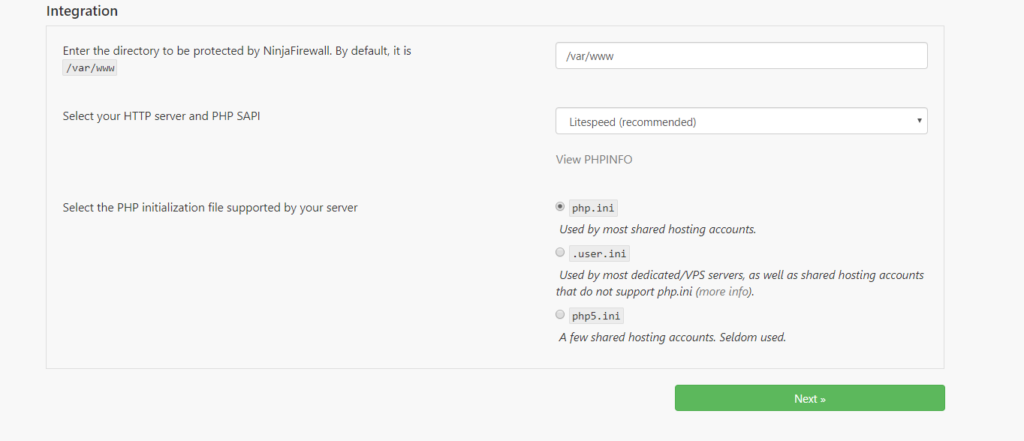
In the integration section, ensure the following is set
Protected Directory: /var/www
HTTP Server and PHP SAPI: Litespeed
Select the PHP Initialization file: php.ini
Now we need add our prepends accordingly
sudo nano /var/www/.htaccess
Put
# BEGIN NinjaFirewall
php_value auto_prepend_file /var/www/fw/firewall.php
# END NinjaFirewall
and
sudo nano /usr/local/lsws/lsphp73/etc/php/7.3/litespeed/php.ini
Edit the existing auto_prepend_file = to
; Automatically add files before PHP document.
 ; http://php.net/auto-prepend-file
 auto_prepend_file = /var/www/fw/firewall.php
Save and restart the OpenLiteSpeed server using
pkill lsphp
/etc/init.d/lsws restart
Then select next on the installer and hopefully you get no errors 🙂
Lastly we need to make our config file writable
chmod 0777 /var/www/fw/conf/options.php
You can now login and manage your Ninja Firewall at https://website.com/fw/ note should you have any issues installing/using applications later on, it is highly advised to check the firewall logs first!
Step 6 : Some Final Tweaks
It is a good idea to force HTTPS on your domains to ensure your login information isn’t snooped on
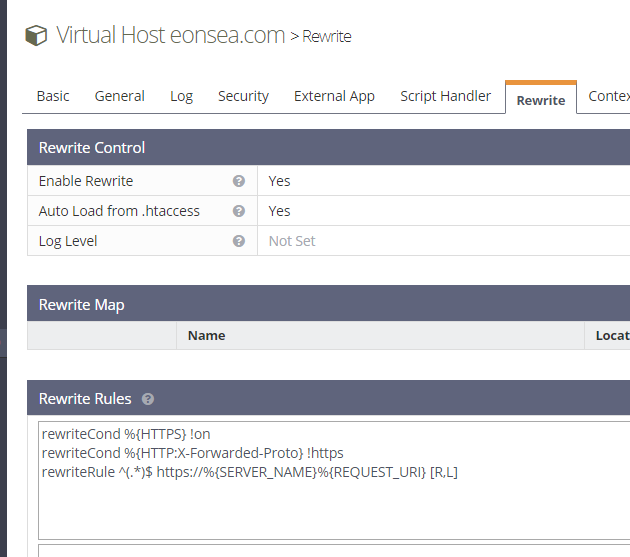
Lets go to the virtual host configuration again, this time on the Rewrite tab and do the following
Enable Rewrite : Yes
Auto Load from .htaccess : Yes (This setting will help with installation scripts later)
Rewrite Rules:
rewriteCond %{HTTPS} !on
rewriteCond %{HTTP:X-Forwarded-Proto} !https
rewriteRule ^(.*)$ https://%{SERVER_NAME}%{REQUEST_URI} [R,L]
Now we should probably setup OpenLiteSpeed itself to automatically update
However since the current update script messes with some package defaults, we need to make some explicit edits to the configuration
sudo nano /usr/local/lsws/conf/httpd_config.conf
Ensure the following 2 lines are set to lsadm and save
user                      lsadm
group                     lsadm
Now we need to add the update script to our cronab
sudo crontab -e
Add the following line, which will run the official update script daily
30 2 * * * /usr/local/lsws/admin/misc/lsup.sh
That’s it! My longest tutorial in quite a while. Hope this helps.
That was an amazing tutorial!! It took me all afternoon to create the setup on an instance. I learned a lot on the way. Thank you.
The only thing I didn’t learn was how to install WordPress. Of course, it wasn’t advertised on the tin.
I can’t image how long it took you to write. Excellent work.
Great job man well done.