This is a collection of scripts I regularly use to fix windows problems; some of them I have written myself and some I’ve gotten from others.
ClearEventViewerLog.ps1 – Clears the event viewer log that can get easily bloated over time
DisableMemoryCompression.ps1 – Disables Windows Memory Compression, which should improve application latency at the cost of a little extra memory
EnableLongPaths.ps1 – Enables Windows to deal with file paths that are longer than 255 characters
Fix_Wifi_Ping_Spikes.bat – Enables/Disables Windows WiFi Discovery; when it is off ping spikes are dramatically reduced, sometimes from 70ms down to 2ms
Regular_Maintenance.bat – Very powerful windows repair script that I wrote, does the usual DISM and SFC stuff, and also fixes the Windows Store, Start Menu and other Windows exclusive packages – This script can often bring Windows 10 back from the brink of death
Bring Back/Remove Open With Option on Context Menu.bat – This script will restore the “Open With” context dialog in the event that it has gone missing
SearchAndPackagesFix.ps1 – This script I wrote attempts to re-install all windows packages and also tries to fix the Windows start menu (It is used by Regular_Maintenance.bat)
Decrapify.ps1 – A powerful third-party script that lets you remove bloatware from Windows (be very careful what you select to remove as some packages are required by Windows)
Additionally I like to use BleachBit to clean the temp file mess created by Windows update and Wise Registry Cleaner(This link gives you a discount you can’t ordinary get) to clean the Windows Registry.
In comes GitBucket a fully self-contained GitHub clone (written in Scala) that you can host yourself and that runs off of the JVM.
Step 0:
First you will have to ensure that your machine has at-least Java8 installed.
In this case we will use the OpenJDK version (because we like open source and development) but note that you can also use the OpenJRE as well as the Oracle Java.
sudo apt-get install default-jdk
Check that your Java version is higher than 8
java --version
In our case we have 11.0.9 which is good
openjdk 11.0.9 2020-10-20 OpenJDK Runtime Environment (build 11.0.9+11-post-Debian-1deb10u1) OpenJDK 64-Bit Server VM (build 11.0.9+11-post-Debian-1deb10u1, mixed mode, sharing)
Step 1:
Now lets download the latest gitbucket.war file from the releases page
Create a new VHOST with whatever parameters you want
Now you’ll want to go to External App->+ sign to add an external app, choose type Web Server
Fill in the details
Now add a new context of type proxy by going to Context->+
Now go to SSL and fill in the SSL parameters from your main domain
Enable Rewrite to HTTPs
Create an A record in your nameserver configuration (in your nameserver’s management interface – typically your domain provider) to point the gitbucket.yourwebsite.com subdomain to your server’s IP address
Add it in both HTTP and HTTPs Listeners for your created VHOST
Save all changes and Do a graceful restart
Now you should be able to visit your subdomain gitbucket.yourwebsite.com and it should automatically redirect to the HTTPS link (this is vital since the connection needs to be secure for logins)
Step 3:
Now that its running we need to make it into a service so that it starts automatically on reboots
First lets move it to somewhere that makes sense for an executable
cd ~
mv gitbucket.war /usr/bin/gitbucket.war
sudo nano /etc/systemd/system/gitbucket.service
Paste the following contents and save
Description=GitBucket Server Service
After=network.target
StartLimitIntervalSec=0
[Service]
Type=simple
Restart=always
RestartSec=1
User=root
ExecStart=/usr/bin/java -jar /usr/bin/gitbucket.war
[Install]
WantedBy=multi-user.target
Now you’ll want to run the following commands to update, start and enable it to run at boot
In order to avoid staring at the screen at right angles (to the detriment of both your neck and sense of orientation) we must make some changes to the configuration file for the orientation matrix in the distro. In the previous tutorial we covered a situation where the distribution didn’t support automatic rotation out of the box; now we cover a situation where the distro does support it.
First lets fix the head cranking temporarily so we can keep our sanity as we do this
Where ACCEL_MOUNT_MATRIX is the transformation matrix that represents our orientation
Now lets add it to the end of our list of display rotations, to do this we follow the instructions at the top of the /usr/lib/udev/hwdb.d/60-sensor.hwdb
sudo nano /etc/udev/hwdb.d/61-sensor.hwdb
Paste in the string you made above, and save
Now we need to get the system to adopt the changes
In these crazy days of programs that span hundreds if not thousands of separate source files; keeping a track of just what changed where and when and which copy is actually the current one without any kind of source control can be a daunting task.
In comes source-control to the rescue, but it(GIT, SVN, Mercurial, etc..) isn’t very user friendly as is. Thus source control repositories with web-interfaces like BitBucket and GitHub have become very popular. These websites let you easily view changes in a graphically friendly environment as well as conduct merges, copies, forks, and various other handy source control operations with a click of a button.
The problem is that these services charge for the privilege of having a private repository, which protects your code from public viewing. That said, the bigger problem is that it is difficult to assure that your code isn’t being viewed from the service provider.
GitLab solves all these problems and adds CI functionality on top of it. Unfortunately GitLab is also quite the configuration monster when you attempt to use it without the bundled Ruby/Puma/Nginx, so we’ll have to proxy it instead of trying to run it directly through LSAPI (trust me I wasted a day going through the nightmare personally of trying to get it to work by manually installing the required ruby gems, setting the paths, etc.. it’s a hopeless cause)
Step 0:
You will need some way of running terminal commands on your machine, in this tutorial I use XSHELL but there are free alternatives such as putty.
If you haven’t you can still follow the tutorial but note that there may be some divergence
Step 1:
We will need to download the package for our distribution of Linux. Luckily GitLab provides a repository installation script which handles a bunch of things for us, so lets grab that.
Next go to the Rewrite tab, Enable Rewrite and Auto Load from .htaccess
Next we need to point the subdomain to this vhost configuration before we configure SSL.
To do so go to the Listeners section and modify both HTTP and HTTPs Listeners
Create a new Virtual Host Mapping
Next if your primary website (yourwebsite.com) already has an SSL cert you can use that one (we will be modifying the certificate a bit later in order to add the subdomain). Otherwise you will have to generate a new cert (as is explained in my earlier tutorial).
Hit the refresh configuration button,
Next we need to adjust our DNS records accordingly to point to the new subdomain by adding an A record for that subdomain with the IP address of our server
Now we need to wait a while for the name-server records to update
Now we need to temporarily remove HSTS ( Strict Transport Security) on the main domain as it will force HTTPs but we haven’t extended our certificate yet
Its as simple as removing “includeSubDomains” and clearing your browser cache
After a while we should be able to visit gitlab.yourwebsite.com and see something
You’ll notice that the SSL won’t validate correctly if you don’t have a wildcard certificate
That means we will have to add the subdomain to the existing SSL certificate for it to be valid as well
Ruby is a popular web programming language that is used for a variety of things while Ruby on Rails is a popular web programming framework that is used to create websites.
The traditional way of transferring files from one server to another is slow and requires a bunch of setup whether its done via archiving, imaging or direct file copy.
Instead you can use LFTP to easily mirror a remote directory on a new VPS.
Step 0:
We need to install lftp
sudo apt-get install lftp
Step 1:
Now we need to connect via ssh to our old server whilst on the new server’s terminal (this is to add its host key otherwise you may get an error in the next step)
ssh -p 22 root@website.com
Step 2:
Use the following series of commands to mirror the directory
open -u user,password sftp://website.com
mirror /path/remoteDir /path/localDir
quit
So a little while back, I was playing around with my machine’s BIOS, and without going into specifics. I messed it up big time.
So much so that eventually I couldn’t get a display to show and no display-out. Hence, I’ve decided to make this tutorial to help those in the same or a similar situation.
The techniques in this article should still apply to any other kind of laptop or computer system where there is a EEPROM that has enough space around it to attach an test clip to.
Note that this should be a LAST-DITCH effort to fix your machine. Try everything else, if it doesn’t work then proceed(Accept that I’m not responsible for anything that goes wrong on your machine).
Prerequisites:
To do this SPECIFIC repair you will require a 25 seriesEEPROM programmer. The series will vary depending on the model number of the BIOS chip on your machine.
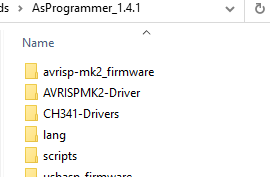
You’ll need a programming software, in this tutorial we will use the open source AsProgrammer (Don’t worry the program has an English translation as well).
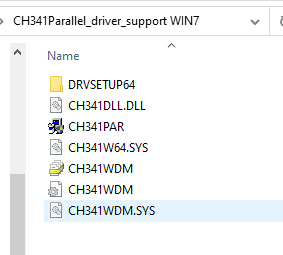
After extracting it you’ll find the CHA341A drivers in the package, install the parallel drivers.
WARNING: DO NOT ATTEMPT TO FLASH USING THE BIOS FILE ON THE MANUFACTURER’S WEBSITE, IT WILL NOT WORK AS IT IS DESIGNED TO BE USED WITH THEIR FLASHING PROGRAM NOT A DIRECT FLASH TO CHIP USING A SEPARATE PROGRAMMER.
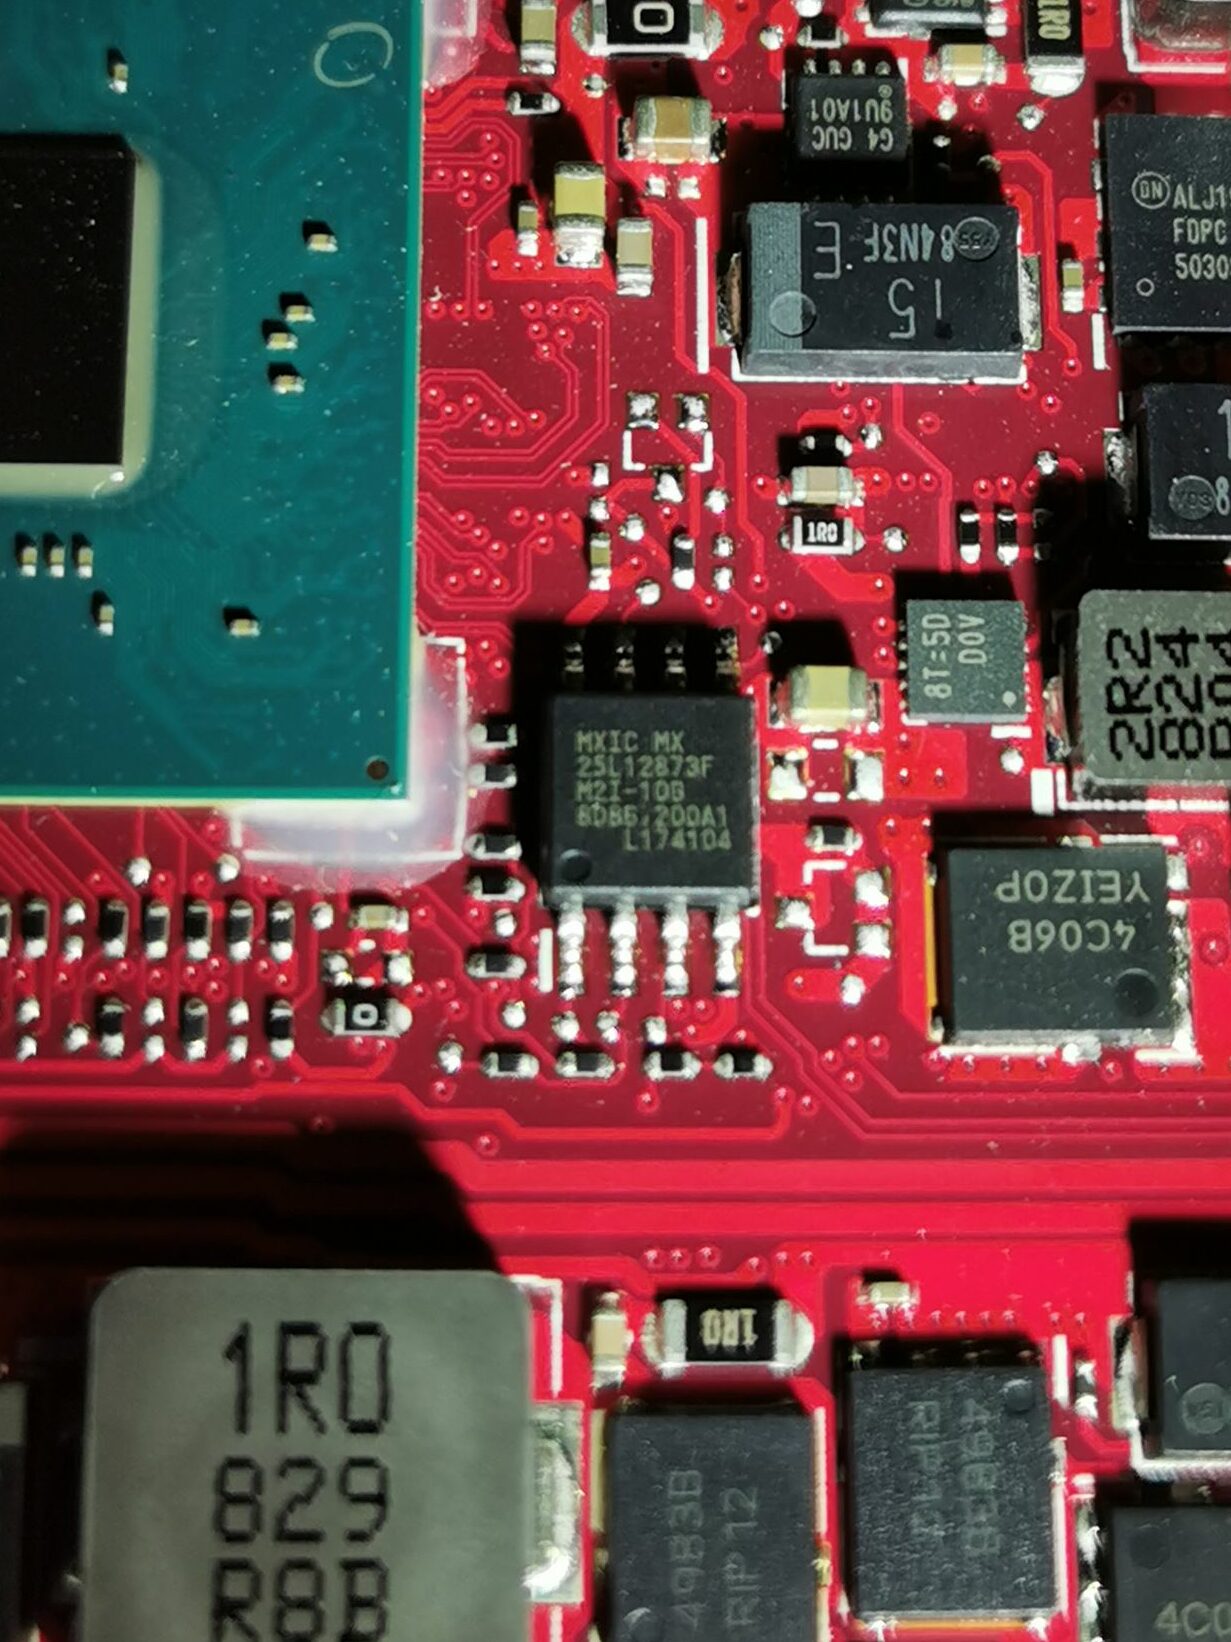
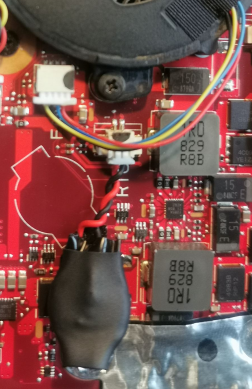
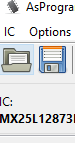
In the case of this laptop it is the MXIC MX25L12873F, notice the 25L part, that refers to the series. It is important to get a programmer that is compatible with YOUR chip as they may have different spacing. Note the little dot on the left hand corner, that is the Pin 1 position, REMEMBER it, it is important later.
Step 3:
Disconnect the Laptop Battery (push the metal cover forward, then pull cable up)
Disconnect the CMOS Battery (pull out)
Step 4:
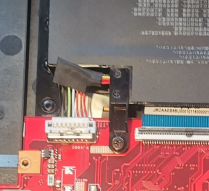
Use the assembled test clip to attach to the bios chip, MAKING SURE, that pin 1 position(the dot indicates pin 1) is connected to the wire that is coloured red/purple. You may need to adjust it several times till you can get a good connection, note that the 2nd red light on the programmer may not turn on until you attempt to write to the chip.
Step 5:
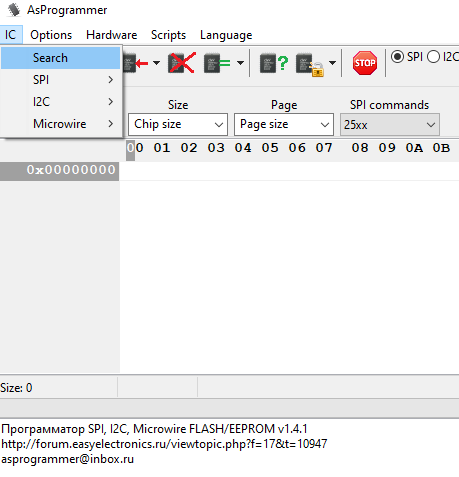
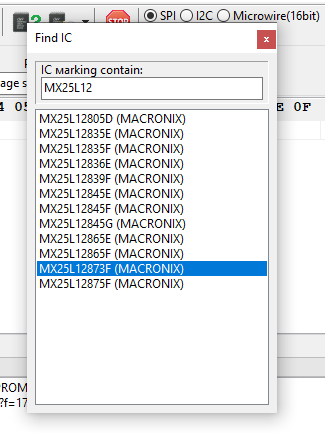
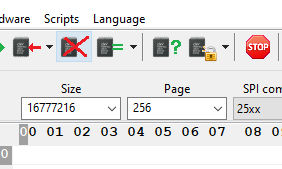
Open AsProgrammer and select IC->Search and put the model number of YOUR bios chip, double click it when you find it.
Step 6:
Now we need to make sure that the connection is good, unfortunately I haven’t found a really easy way of doing this.
Option 1: If you haven’t flashed before using a hardware programmer you can try to read the chip and make sure that you don’t get all 00 or FF in the hex view.
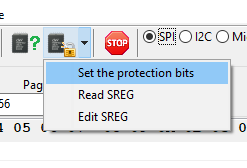
Option 2: You can try to Protect and UnProtect the chip, as this process will hang unless you have a good connection.
Option 3: You can try to program the IC with some random file or data and then read to see if the same hex data was read that was written.
Either way, once you’ve verified that the connection is good you can proceed.
Step 7:
Now its time to erase the IC and program it with the BIOS file you downloaded earlier.
First Erase the Bios, and wait for the complete message to appear below
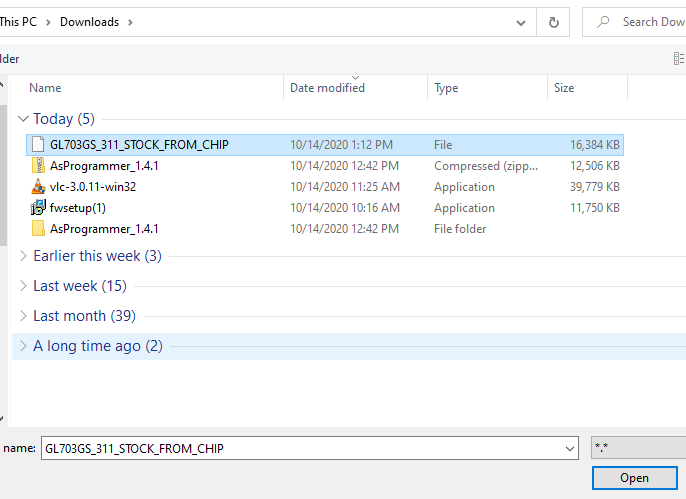
Now open up the BIOS file
Now click Program IC
Then let it finish
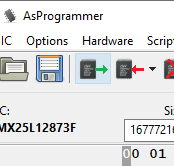
Now its time to verify it was written correctly, so click Read IC
And ensure that the contents of the hex view are the same as before (just check the starting bits and the ending non-zero bytes to make sure they are the same)
Start
End
Step 8:
Now its time to re-assemble the laptop, first re-connect the CMOS Battery, then the Laptop Battery, reassemble the laptop case, then plug in the charger, and give it a try. Hopefully at this point your machine should boot.
That’s it 😉
Hope this tutorial helps you out of a bind, it took me a while to figure this stuff out.
Helpful tip: If you are modding and have used the official updater program and are wondering why your BIOS keeps updating/bricking itself upon reboot, you need to remove the firmware BIOS update driver, in device manager (as that is where it installs)
Recently, I ran into a problem when I tried to install another copy of windows on a different drive.
You see I had no idea that Windows 10 only keeps one copy of its boot-loader no matter many operating systems are installed.
I also had no idea that it merges any existing boot-loaders into the new one upon installation. In other words, when I installed windows on the new drive my old boot-loader was deleted and its contents were put into the new boot-loader ON THE NEW DRIVE.
This wouldn’t of been a problem if I hadn’t intended on using that drive for a completely different machine. Which is exactly what I did.
That meant that I couldn’t boot up my original machine anymore (without the new drive) because the boot-loader no longer existed on it.
After much trial and error, I ended up with a solution to this, and many other boot-loader issues.
The following steps should recover from almost any kind of boot-loader corruption/problem.
Step 1:
Boot into the Windows Recovery Environment using a USB or using the existing recovery partition on your system.
Open up command prompt and locate your windows drive. (Sometimes the drive letter will change in the recovery environment so be sure to find the correct letter).
Step 2:
Run the following commands in order, keeping in mind the drive letter you found earlier (be sure to replace the bracketed content and remove the brackets):
bootrec /ScanOs
bootrec /FixMbr
bootsect /nt60 SYS
bootrec /FixBoot
diskpart
list disk
sel disk [Windows Disk # Here]
list part
sel part [System Partition # Here]
assign letter=V:
exit
bcdboot [EXISTING WINDOWS DRIVE LETTER]:\Windows /s V: /f UEFI
bootrec /RebuildBcd
Step 3:
Reboot to Windows
Note you may have multiple windows entries, try each one till you find the one that works
Now you can delete the extra entries using msconfig utility, and then check the box that says make boot changes permanent and hit apply.
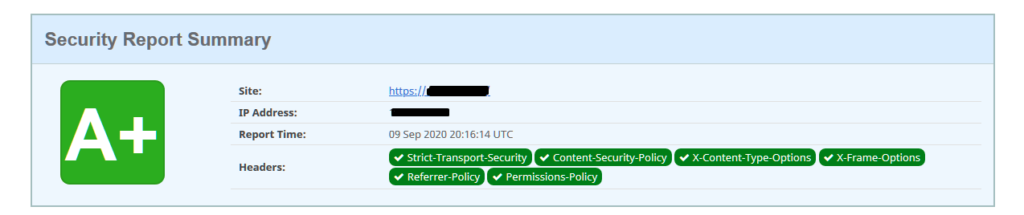
Sometimes we spend so much time protecting our websites that we forget about protecting our users. It is more efficient to be proactive than reactive.
For this reason its a good idea to set some security HTTP headers so that if your users do get targeted by a hacker that they won’t be able to as easily fool them into handing over their credentials.
Step 1:
First lets open up the LiteSpeed WebAdmin console by heading over to
https://yourwebsite.com:7080
Now click on the magnifying glass icon to edit the virtual host and navigate to context
Navigate to the context tab and hit add
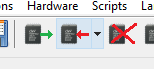
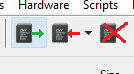
Make the type “Static” and hit the skip icon to the upper-right to go next
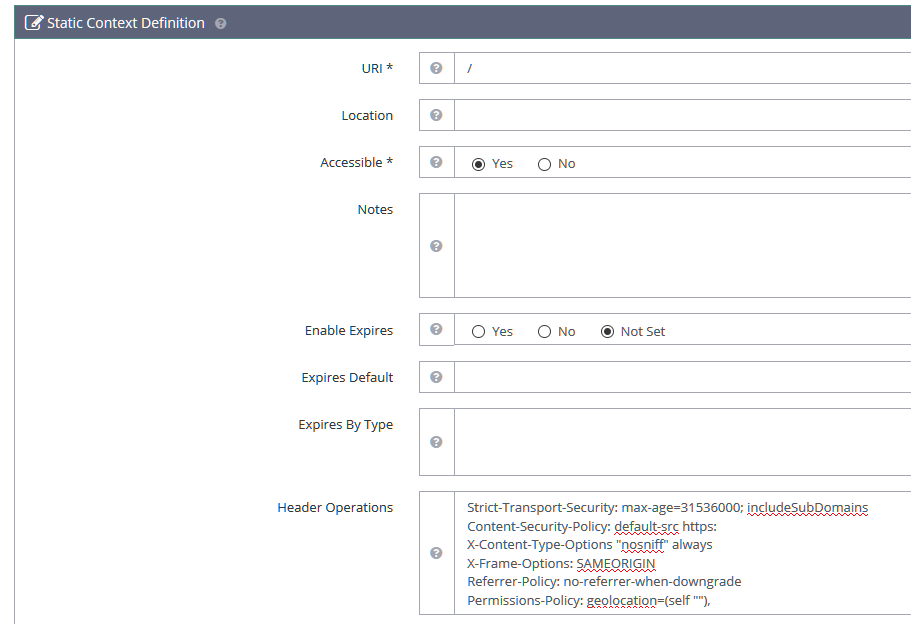
Now fill out the following, in the URI section put “/” or any subdomain you want, set accessible radio button to yes and add the following in the Header Operations box
NOTE: It is a good idea to understand exactly what Content-Security-Policy does before adding it, as if you use this without checking first if your scripts are loading anything outside your domain name it will stop those scripts from loading in browsers.
If you would like to learn more about these headers I suggest researching them individually.
Especially if you would like to have a more fine-tuned setup.
Please note that some of these settings can break your website if it isn’t built to use HTTPS or if it has errors/bad-practices in its make-up, please research/test each individual header prior to going to production with them.
Now as to how to run firefox, if you are using gnome you can just use the plugin mentioned previously and browse to it, however if you are trying to run it from console flatpak has a way to do that